Read how Suzy Moger, local painter and printmaker, designed the new Filberts Lino Print Greetings Card. From initial sketches, to carving the lino, and printing the final piece, here’s Suzy’s story of how it was made.
We decided that a linocut would be a great place to start with a new range of Filberts greetings cards. The bold simplicity of the linocut is an excellent medium for some really striking images and seemed just right to capture some bees at work.
I drew a few bee characters, it is surprisingly difficult to capture the nature of a bee without it looking too evil or too cute. Bees up close look a bit like aliens. Anyway, it was important to everyone at Filberts that the bees look neither too fierce nor too whimsical. I can only hope that I’ve fulfilled that brief!
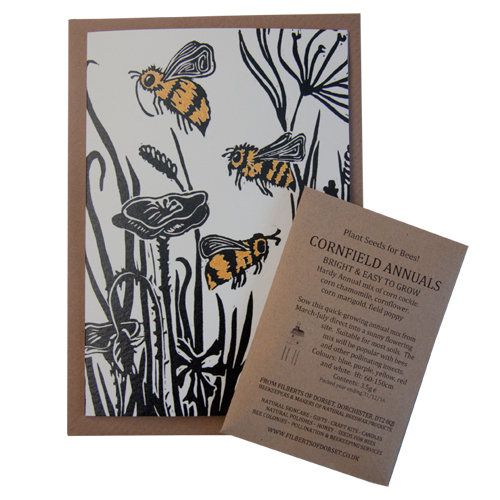
The card is available on its own, with seeds for bees or as a candle card.

Sketches for linocut
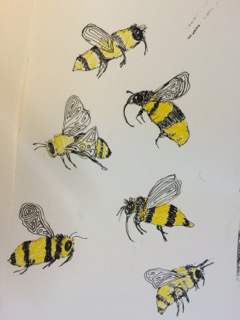
Black and yellow bee drawings
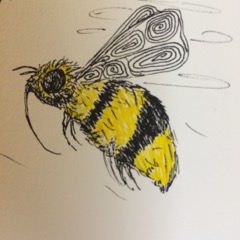
Close up of bee drawing

The design in marker pen on the lino

Initial print

The lino print

Lino print greetings card

Lino cut greetings card with candle
Then I drew some different flowers based on the seeds for bees that we use at Filberts. Combining these two images I produced some drawings of a hedgerow scene. I transferred the image onto a piece of soft-cut lino (I like to work on this particular material as it carves smoothly and is less painful on the hands). Once the image was on the plate, I used a marker pen to draw out the areas I wanted to leave and another (this one bright pink) to indicate where I wished to carve away the block. This is a handy tip, as once you get carving the surface is less easy to make out and it is easy to become muddled. Once I’d reached this point I was ready to begin carving.
I ran a few test prints in order to see whether the block would be successful. Then I made a couple of adjustments before running a final print.
The next stage was to spend a morning with Freya, so she could digitise the image and prepare it to send to the printers ready to produce a proof. The printers did their thing and here they are, new greetings cards! Available with seeds or candle-rolling gift or as cards alone.

- Making a linocut for our new greetings cards - 2nd February 2017
- In the production barn today - 1st November 2016
- Making Muscle Rub - 26th September 2016